年过半世纪的咖啡老店,
独门秘方的咖椰食谱,
果然不是盖的!
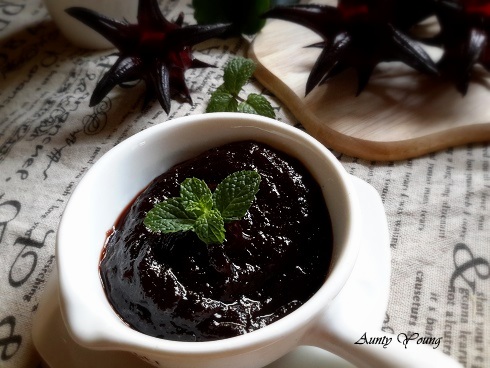
深褐色的色泽,一见倾心。
口感顺滑溜口。
味道更是一级棒;
鸭蛋搭上椰奶,天下无敌鲜美!!
这就是满满的童年回忆。

古早味鸭蛋咖椰
2。 将隔水锅下层的水煮热,上层倒入做法(1)的糖蛋糊。以木制搅拌器搅拌均匀,倒入椰奶,拌匀。过后,每个10分钟搅拌一回。
3. 40分钟后, 另外在一个小煲,中火煮80克的糖成焦糖液,然后倒入糖蛋糊内,快速以木搅拌器搅拌均匀。这时颜色开始变深褐色。过后,每个10分钟搅拌一回,直到咖椰幼滑微稠即可。全程大约费时60分钟。
小贴士:
1。鸭蛋只打散,不起泡。过虑鸭蛋,成品会幼滑。
2。下层水只需热,不需滚。
3。 以不沾煲来煮焦糖较容易操作。
3。 成品完全冷切后,才可装入瓶子。


Authentic taste of duck egg Kaya
Video : here
Ingredients :
4 duck eggs (255g)
500ml coconut milk
270g sugar
80g sugar (for caramel purpose)
5 pcs pandan leaves
Method :
1. In a bowl, gently beat the eggs,then sift it. Add in sugar 270g sugar, stir-mix until the sugar dissolved.
2. Heat up the water of the double boiler. Pour in the egg sugar mixture from step (1). Stir evenly with wooden spatula, pour in coconut milk, mix well. In the following process,stir the kaya at every 10 minutes interval.
3. After 40 minutes, in another small pot, boil 80g sugar to caramel liquid, pour it into kaya, stir it immediatelyst it with wooden spatula. Now you can see the color turn into dark brown.
Tips:
1. Gently beat the duck eggs, no bubbles. sifted the edds will end up with smooth kaya.
2. Only heat up the double boiler water, not boiling.
3. Use the non- stick pan to prepare caramel will ease the job.
4. Keep the kaya into the container when it is completely cooled.
Ingredients :
4 duck eggs (255g)
500ml coconut milk
270g sugar
80g sugar (for caramel purpose)
5 pcs pandan leaves
Method :
1. In a bowl, gently beat the eggs,then sift it. Add in sugar 270g sugar, stir-mix until the sugar dissolved.
2. Heat up the water of the double boiler. Pour in the egg sugar mixture from step (1). Stir evenly with wooden spatula, pour in coconut milk, mix well. In the following process,stir the kaya at every 10 minutes interval.
3. After 40 minutes, in another small pot, boil 80g sugar to caramel liquid, pour it into kaya, stir it immediatelyst it with wooden spatula. Now you can see the color turn into dark brown.
4. In the following process, stir the kaya at every 10 minute interval until the kaya become smooth,shiny and creamy. The whole process take time about 1 hour.
Tips:
1. Gently beat the duck eggs, no bubbles. sifted the edds will end up with smooth kaya.
2. Only heat up the double boiler water, not boiling.
3. Use the non- stick pan to prepare caramel will ease the job.
4. Keep the kaya into the container when it is completely cooled.


@@@@@ Enjoy ! @@@@@