粗拙的手法,贫乏的构思,
甚至有点手忙脚乱,
一点惊慌,又一点兴奋,
最后。。。。。。。。。。。。
达得拉。。。。。。。
人生第一个装饰蛋糕,终于面世了。

每回浏览众姐妹的部落格,
看见装饰美美的各类蛋糕,
就把我引得心痒痒,
今天,总算缘到事成,
有了自己装饰蛋糕的记录。

第一次用奶霜,难免错漏百出,
但是,内心还是喜悦的,
毕竟是自己一手一构思的作品,

虽然比起一般蛋糕店的专业水平,还有一段距离,
但是以一个新手来说,
情人眼里,早已出西施咯,哈。。。。。

美中不足的是,
香芋酱糊虽然美味可口,
但是略嫌不够顺滑,
造成小小的遗憾。
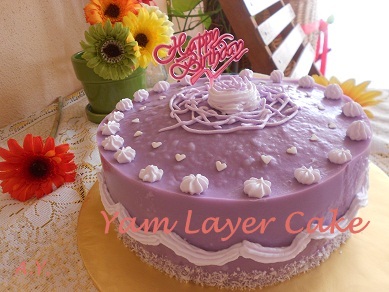

虽然蛋糕的外貌装饰功力不够,
但是味道和口感却不错,
尤其那真材实料的香芋酱糊,
真的超甜香,超好吃~ ~ ~


食谱参考: Alex Goh
Ingredients :
1 9" round vanilla sponge cake
A. 800g water
200g sugar
pinch of salt
2 tbsp agar-agar powder
B. 300ml coconut milk
300g yam cooked
C. 200ml coconut milk
85g cornflour
D. 1/8 tsp purple colouring
Method :
1. Cut the vanilla sponge into 3 horizontal layers.
2. Cook (A) till boiling.
3. Mash the cooked yam while it is still hot with coconut milk from (B). Add it into (A), mix till well blended. This mixture can be sieved to obtain a finer and smoother texture.
4. Continue to cook the above mixture till it boils, then add (C) and cook till thicken.
5. Place the 1st layer of the cake into a 10" round spring-form mould. Pour some of the yam pudding and smooth over, then top with another layer of cake.
6. Repeat the above steps 2 more time, finishing with the pudding on top.
7. Let it cool, then refrigerate.
8. Unmould, coat the side of the cake with desiccated coconut.


