显示标签为“Birthday Cake (生日蛋糕)”的博文。显示所有博文

2020年4月6日星期一

免烤柠檬乳酪蛋糕(杏桃嗻哩上层)Non-bake Lemon Cheesecake (with apricot jelly topping )


4月6日,
安哥的生日。

2020年1月17日星期五

福报满满之25周年婚庆 - 巧克力蛋糕蛋糕(推荐)(Happy 25th Wedding Anniversary - Chocolate Indulgence Cake(Recommended)


今天是安迪是和安哥的结婚25周年日。
也是俗称银婚 Silver Wedding。


2019年7月4日星期四

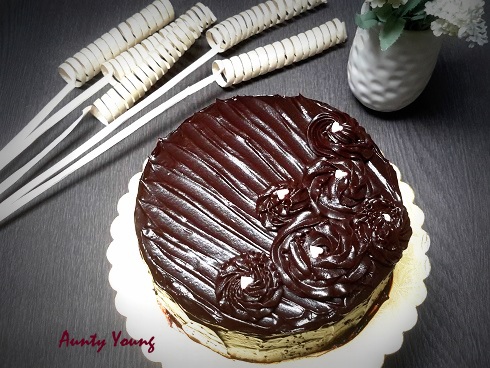
放纵浓郁巧克力蛋糕 (Chocolate Indulgence)


放纵! 放纵!放纵!
这是一个吃多了有内疚感的蛋糕。

里边的鲜奶油和巧克力所带来的热量,
绝对会使对健康讲究的你, 
欲食又罢。

不过,
一旦你尝了一口,
浓郁的巧克力和香醇的奶油香气,
肯定让你溃不成军,
一口接一口,欲罢不能哦。

2019年4月21日星期日

提拉米苏蛋糕 ~ 9寸 (Tiramisu Cake ~ 9")


4月对安家来说是喜气洋洋的。
因为有五位成员是月生日。


其中一位就是亲爱的“安哥”。
然后顺它的意,
烤了这个我已经做了很多次的提拉米苏蛋糕。

2017年9月5日星期二

黑森林蛋糕 (Black Forest Cake)


外面卖的黑森林蛋糕吃多了,
今天托邻居(阿益的福),
终于可以吃自己烤的黑森林蛋糕了!
谢谢哦!


2017年8月22日星期二

贵族巧克力蛋糕(Royal Chocolate Cake)


8月22日(22August)。。。
祝我生日快乐!
Happy BirthdayTo Me!
Selamat Hari Jadi Kepada Ku!

2017年8月13日星期日

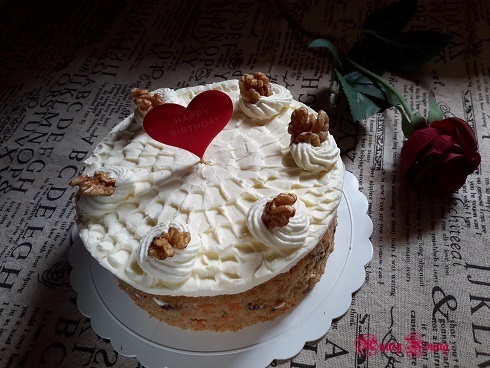
萝卜核桃蛋糕加奶油乳酪糖霜 (Carrot Walnut Cake with Cream Cheese Frosting)


8月在安家是个热闹的月份。
8月10日是安家三伯娘的生日;
8月12日是安家三伯的生日。
所以今天安迪给两位安家亲爱的长辈做个生日蛋糕  ~~
萝卜核桃蛋糕加奶油乳酪糖霜,
希望他们两会喜欢。


在此祝福安家三伯与伯娘,
身体健康,恩爱幸福,
生日快乐!


很满意这个萝卜核桃蛋糕体,
松软香醇,甜度适中,口感一级棒,
谢谢JeannieTay 的美好分享。

加上香滑的奶油乳酪糖霜,
这蛋糕好好吃!


萝卜核桃蛋糕加奶油乳酪糖霜

1个 9寸 圆形烤模

材料:
4 个     鸡蛋
250g    细砂糖
220g    植物油
2茶匙  香草精
260g    面粉
3/4 茶匙 苏打粉
1 1/2 茶匙 发粉
1/2茶匙 盐
1茶匙  桂皮粉
120g    核桃(以手指1砌成4)
300g    红萝卜丝

做法 :
1。将细砂糖和蛋搅打至乳白霜状,加入植物油和香草精,拌匀。
2。 筛入面粉,苏打粉,发粉,盐和桂皮粉,拌匀。
3。 拌入核桃和红萝卜丝,拌匀。
4。 将面糊倒入已铺上油纸的9寸圆形烤模,送入已预热烤箱185°C,烤约45- 50分钟或插入插支拔出时,不粘糊的。让蛋糕呆在烤模里冷却10分钟后才倒扣于凉架上。


奶油乳酪糖霜 :
150g  奶油乳酪
60g    牛油
60g    糖粉

做法 :
将所有材料搅拌均匀。铺盖在已经完全冷却的蛋糕上。随喜装饰,冷藏于冰箱1小时即可。


Carrot Walnut Cake with Cream Cheese Frosting
One 9 inches round baking tin

Ingredients:
4  eggs
250g caster sugar
220g vegetable oil
2 tsp vanilla extract
260g flour
3/4 tsp baking soda
1 1/2 tsp baking powder
1/2 tsp salt
1 tsp cinnamon powder
120g walnuts(roughly squeeze  into small chunk  )
300g grated carrots

Method:
1. Beat the eggs and caster sugar until white and creamy, then mix in the vegetable oil and vanilla extract.
2. Sieve in the flour, baking soda, baking powder, salt and cinnamon powder.
3. Fold in the walnuts and grated carrot until even.
4. Pour the batter into a lined 9-inch round cake tin and bake in  preheated oven at 185°C for 45-50 minutes, or until a skewer inserted comes out clean. Allow to cool in the tin for 10 minutes before inverting onto a rack.

Frosting ingredients:
150g cream cheese
60g butter
60g icing sugar


Method:
Mix all the ingredients evenly to form the frosting before applying it in a thick layer onto the cooled cake. Decorate the cake as desired before chilling in the fridge for an hour.


@@@@@ Enjoy ! @@@@@


2017年7月15日星期六

提拉米苏蛋糕 ~ 7寸 (Tiramisu Cake ~ 7")


上一张贴,安迪出的提问,你猜对了吗?
对了,猜对了,就是提拉米苏蛋糕。


2017年5月13日星期六

English Lemon Gateau (英式柠檬蛋糕)


I had been thinking of baking this beautiful and yummy birthday cake for quite some time.
Today is one of my good friend's birthday.
So I took this opportunity to give it my first attempt. 

2016年4月5日星期二

法式薄荷巧克力千层蛋糕 (French -style Mint Chocolate Mille Crepes)


今天我与"嘛吉"们有装饰蛋糕之约。
做了父女俩喜爱的法式千层。

居于蛋糕本身的千层奶油霜,
自然就把外围的奶油装饰给省略了,
希望"嘛吉"们不要判我犯规哦, 呵。。。。。呵。。。


法式薄荷巧克力千层蛋糕

用具:
不沾平底锅(24公分),抹刀,
蛋糕转盘,8寸蛋糕板

千层蛋糕皮:

材料(可做20 片)
A :鲜奶225克
      鸡蛋135克
      盐1/4茶匙
      普通面粉65克
      糖分28克
B : 牛油25克(隔水炖溶)

做法:
1。 材料(A)放入大碗搅拌均匀过滤。 休面30分钟,要煎之前加入(B)料拌匀。
2。 以中火将不沾平底锅烧至冒起微烟,用勺子舀入适量的做法(1),迅速将锅转一圈至面糊薄薄地沾满锅底,将剩余的面糊倒回(1),然后将饼皮煎熟。
3。 当(2)的饼皮煎至边沿微黄,以刮刀刮离锅,再用手取出,放在一个碟子内,重复做法至完。(记住,每次舀面糊之前必须先搅拌,否则面糊最后会很浓稠。 万一面糊变稠了,可加入少许水调稀。)

馅料:
A : 植物性鲜奶油400克
     薄荷香精1/2 茶匙
     食用绿色素一滴
B :  适量可可粉

装饰:
适量纽扣巧克力和薄荷


做法 : 
1。 煎饼皮:材料及做法参考以上。
2。 馅料: 将所有材料(A) 放入大碗以打蛋器搅拌至浓稠幼滑。(如未用可先放入冰箱,使其保持结实)
3。 组合 : 将蛋糕板放在蛋糕转盘上,铺1片饼皮,抹1层馅料,再叠上1片饼皮,用手按一下饼皮中间部分,在抹上1层馅料,再排入一层饼皮,重复至完。间中每隔两层就撒上适量的可可粉。最高一层铺上一层薄薄的鲜奶油。以纽扣巧克力和薄荷叶装饰。冷藏于冰箱隔夜才享用。


French - Style Mint Chocolate Mille Crepes
Utensil & material needed :
24cm non- stick flat frying pan ,palette knife,
cake turntable, 8" cake board

To make crepes :
Ingredients (Makes 20 - 22 pieces)
A :  225g fresh milk
      135g eggs
      1/4tsp salt
      65g plain flour
      28g icing sugar
B : 25g butter ( melted by double-boiling)

Method:
1. Place ingredient (A) into a large mixing bowl, stir well till batter is smooth. Strain through a sieve, rest for 30 minutes.  Add in ingredient (B) and mix in well just prior to frying crepe.
2. Heat a non-stick pan over medium heat till the pan is hot and smoking slightly. Scoop up no.(1) and pour a little batter into the pan. Tilt the pan so that just a thin layer of batter covers the base. Pour off any excess batter back into no. (1). Cook crepe till underside has set.
3. When the edge turns to a pale golden, use a spatula to ease it away from pan. Use your hand to lift the crepe
 out carefully. Lay the cooked crepes in a container while you cook the remainder. (Remember, you must stir well before each scoop or else batter can thicken on standing. If this happens, dilute it with a drizzle of water.) Repeat process to the end.


For filling :

A : 400g topping cream
     a drop of edible green coloring
     1/2 tsp mint essence

B : some cocoa powder

For Topping :
Some button chocolate chips
some mint leaves

Method : 
1.  To make crepes  For ingredients & method please refer above.

 
2.  For filling :  Place the ingredient (A) into a large mixing bowl, beat till smooth and thickened.  (keep chilled if not needed immediately).

 
3.  To assemble :  Lay cake board on the turntable. Place 1 piece of crepe from no. (1) on it. Spread a thin layer of no. (2) on top. Stack on another piece of crepe no. (1). Lightly flatten with your hand along the center point (this helps the cream to sit better).  Next, spread on a thin layer of no. (2).  Repeat process to the end. Scatter some cocoa powder every 2 layers.
Spread the cream over the top layer and decorate with button chocolate chips and mint leaves. Chill overnight before serving.


@@@@@ Enjoy ! @@@@@


2016年3月21日星期一

巧克力富奇蛋糕(Chocolate Fudge Cake)


当接下这道对我来说是"Mission Impossible"的邀约时,
心理真的有点压力。

幸好把压力化为推动力。
尽管过程惊心胆跳,成品也是差强人意,
最后还是为自己敢于尝试为赞,
哈。。。。哈。。。


巧克力富奇蛋糕
(6寸圆形烤模)

食谱参考 : Aunty Young , Dailydelicious
材料:
低筋粉          120克
发粉              1 1/4茶匙
可可粉          35克
热水              60毫升
牛奶              30毫升
奶油 (软化)   100克
细砂糖          170克
蛋                  2个

夹馅:
随喜奶油酱或打发巧克力甘纳许

打发巧克力甘纳许:
黑巧克力           130克
动物性鲜奶油   120克
糖浆                     15克
奶油 (软化)          20克

做法 :
1。 将低筋粉和发粉筛过,置旁待用。
2。 可可粉和热水拌匀,加入牛奶拌匀,置旁待用。
3。 将奶油和细砂糖搅大至蓬松发白。 逐粒加入鸡蛋,拌匀。
4。 加入一般的粉类,拌匀。
5。 加入做法(2)的巧克力牛奶,拌匀;再加入剩余的粉类拌成均匀的面糊。
6。 将面糊倒入烤模,抹平表面。
7。  送入预热烤箱180°C,烤约55 - 60 分钟或经触时摸表皮会弹回。让蛋糕保留于模子内,冷却约30分钟。
8。  蛋糕脱模后,置放凉架上。 待完全冷切后切成两片,涂上奶油浆/打发巧克力甘纳许夹馅。

干那许的做法 :
1。将巧克力放入一个碗内。 煮滚动物性鲜奶油和糖浆, 然后倒入巧克力碗内,约1分钟后,搅拌至巧克力溶化。
2。加入奶油,等约1分钟,奶油开始溶化,搅拌成顺滑的甘纳许。
3。将顺滑的甘纳许打发,然后铺面于巧克力富奇蛋糕。(如果天气过热,向冷藏于冰箱30分钟才打发)


Chocolate Fudge Cake
(6" round tin)
Recipe adapted from :  Aunty Young , Dailydelicious

Ingredients :
120g cake flour
1 1/4tsp baking powder
35g cocoa powder
60ml hot water
30ml milk
100g butter (soft)
170g caster sugar
2 eggs


Filling
Jam of your choice or you can use whipped chocolate ganache.

Whipped chocolate ganache
130g dark chocolate
120g whipping cream
15g glucose syrup
20g butter (soft)

Method  :

1.  Sift the flour and baking powder.
2.  Mix the cocoa powder with boiling water evenly then add milk and stir until fully combined.
3.  Beat the butter with the caster sugar  until fluffy and light in color, then add the eggs one at a time and beat until combined.
4.  Pour half of the flour into the bowl and fold to combine.
5.  Pour the chocolate milk mixture into the bowl and fold to combine, then add the rest of the flour and fold to combine too.
6.  Pour the batter into a lined cake tin and smooth out the top.
7.  Bake in a preheated oven at 180°C for 55 - 60 minutes or until the top of the cake springs back when touched lightly. Let the cake cool in the pan for half an hour.
8.  Remove the cake from the tin and let it cool completely on a wire rack, then cut it into 2 layers. Spread the ganache over one layer, then place another layer on top before covering the entire cake in ganache.

Make the ganache :
1.  Put the chocolate in bowl.  Boil the whipping cream with glucose syrup, then pour into the chocolate wait for 1 minutes, then stir lightly until the chocolate melted. 

2.  Add in butter, wait for 1-2 minutes until butter started to melt, stir lightly until combine.

3.Whip the ganache until soft peaks formed and use the ganache to cover the cake.(  If the weather is hot, refrigerate the ganache for 30 minutes .)


当蛋糕出炉时,也是我赶着出门之时,
却惊讶,天啊!蛋糕体中央还很潮湿,

顿时内心凉了一半,
时间匆促下,只好置旁待冷,回来再做打算。


幸好冷却后的蛋糕,再冷藏于冰箱一夜,
第二天早上,再见已是美化了的蛋糕体。

于是快快赶着下午,雨婆婆到访之前,
打发巧克力甘纳许,将蛋糕铺面及装饰。

谁知,那淘气的雨婆婆,
明知我已经赶时赶到七上八下,
就在蛋糕装饰后,也冷藏后,
全部就绪,准备“咔嚓,咔嚓。。。”时,
她。。。。。。竟然沙沙。。。。。大摇大摆的到访了!!!

你说,你说,她是不是很淘气呢???


结果。。。。
就是你们看到不是黑鲁鲁的切片蛋糕体,
就是曝光的图片。

不好意思,遇上雨婆婆到访,
惟有大家将就一些。
嘻。。。。嘻。。


虽然照片无法表达这蛋糕的美味,
不过安迪代娜娜向你们推荐,
蛋糕体湿润,巧克力甘纳许浓郁,
两者相容,她说,好好吃!


@@@@@ Enjoy ! @@@@@

2015年11月13日星期五

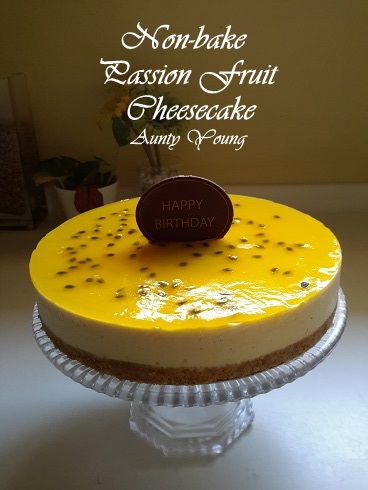
免烤百香果乳酪蛋糕 (Non-bake Passion Fruit Cheesecake)


前几天(9/11)是契女,Mel的生日。
因为今年巧遇SPM考试,为了不耽误她做最后冲刺,
契妈我只能暂时送上亲自做的生日蛋糕,
一来祝她生日快乐!而来愿她考试顺利!

我们已经约好,下个月的9号,
也就是生日的一个月后,好好的补庆一番。


免烤百香果乳酪蛋糕
(7寸圆形脱底模/6寸方形脱底模)

饼干底 :
苏打饼干片 – 80g
烤香核桃 - 20g
牛油 – 50g

乳酪蛋糕体 :
软化奶油乳酪 – 270g
细砂糖 – 55g
百香果 – 3颗(只取果汁)
动物性鲜奶油– 100g
吉利丁片 –10g

上层材料 :
百香果 -1颗
芒果汁或水(芒果汁或水加上百香果共90毫升)
吉利丁片- 2g


饼底做法 :
1。 将苏打饼干和烤核桃放入塑胶袋,以擀面棍压碎
2。 牛油隔水溶化,然后加入以上的饼干碎,拌均匀
3。 倒入已包上铝箔纸的底部,用汤匙压平,冷藏于冰箱约30分钟。

乳酪蛋糕体做法 :
1。 吉利丁片泡冰水软化,备用
2。 将奶油乳酪和细砂糖隔热水拌至无颗粒状,加入百香果汁拌均匀。
3。 将动物性鲜奶油倒入一个外围冰块的钢盆中,打发。
4。 把打发的动物性鲜奶油加入乳酪糊里,拌均匀。
5。 将泡软吉利丁片挤干水分放入以上乳酪糊,搅拌至溶解。
6。 最后将乳酪糊倒入饼底上,盖上保鲜膜,冷藏于冰箱冷藏3个小时或表面凝固。


上层做法:
1。 芒果汁加百香果肉共90毫升与2克的泡软吉利丁片,个热水煮至吉利丁片溶解。
2。 取出乳酪蛋糕,淋上百香果果冻,普盖上保鲜纸,再度冷藏于冰箱约6小时或隔夜。


 Non-bake Passion Fruit Cheese cake
(7 inch round tin with removable base/ 6 inch square tin with removable base)

Biscuit base:
80g digestive biscuits
20g toasted walnut
50g butter

Cream cheese mixture :
270g softened cream cheese
55g castor sugar
3 passion fruit (only extract the juice)
100g whipping cream
9g gelatin leaf

Topping ingredients :
1 passion fruit
mango juice or water ( plus passion fruit to get a total 100ml)
2 g gelatine leave (soak into cool water to soften it)


Method for biscuit base:
1. Pour in the digestive biscuits and toasted walnut in a plastic bag and crush them with a rolling pin.

2. Double-boil the butter to melt it , then mix it evenly with the biscuit crumbs from (1).

3. Pour the crumbs mixture into the aluminum foil-lined round tin, flatten them evenly into a base, then chill in the fridge for about 30 minutes.


Method for cheesecake:
1. Immerse the gelatin leaf into ice water and set aside for later use.

2. Double boil the cream cheese + caster sugar and stir until the sugar has completely dissolved. Pour in the passion fruit juice, stir well.

3. Whip the whipping cream in a stainless steel bowl surrounded by ice cubes, until soft peaks form.

4.  Pour in the whipped whipping cream into the cream cheese mixture(step 2), mix well.

5. Drain the gelatin leaf of excess water and mix it into the cheese mixture(step 4). Mix evenly.

6. Pour the cheese mixture into the tin and chill in the fridge for 3 hours or until the surface solidifies.


Method for topping:
1.  Measure a total of 90 ml mango juice /water + passion fruit. Mix them with 2g of softened gelatin leaves in a double boil pot, until the gelatin leave have fully melted.

2.  Remove the cheese cake from the fridge, pour the passion fruit jelly on it, cover with wrapping paper and chill for about 6 hours or overnight.


这次同样的食谱,我做了2个蛋糕。
一个是7寸圆形,送给契女;
另外一个是6寸方形,给那两父女。
因为他们可是乳酪蛋糕控,
怎么可以没份吃呢?


@@@@@ Enjoy ! @@@@@

2015年7月10日星期五

提拉米苏蛋糕 ~ 8寸(手指饼干)Tiramisu ~ 8"(lady fingers)


 这是配合娜娜一班死党为娜娜搞惊喜生日会的蛋糕。
还记得2年前,娜娜的三五知己,悄悄和安迪安排惊喜的戏马,
当时童心未眠的安迪和安哥也配合得天衣无缝,
让娜娜留下一个美好的生日回忆。 

事隔2年,历史重演,稍微不同的是,
今年娜娜外出回来后,就窝在她的房间。
直到安迪假意知会她要外膳催她洗澡时,
死党们是一个接一个,悄悄地进入屋里布阵,
然后。。。。。。当主角下楼时,
死党们才一窝蜂从厨房,一边捧着蛋糕,一边唱生日歌,
当时的娜娜既惊又喜,错愕腼腆,
接着就是一阵尖叫声,喜气洋洋,闹气喧天。


提拉米苏蛋糕(手指饼干) 
Tiramisu(lady fingers)
8寸圆形脱底模 (8" base removable rould mould )

材料Ingredients:

咖啡酒糖液 Coffee liquor
 2 tbsp香浓即溶咖啡粉 Instant Coffee powder
230ml热水  Hot water
1tbsp糖 Sugar
40ml咖啡酒 Khalua                                   

马斯卡芬乳酪馅 Mascarpone cheese filling :
450ml鲜奶 Fresh milk
160g糖 Sugar
5g吉利丁片 Gelatin leaves
35g面粉 Flour
6个蛋黄,打散  Egg yolk,beat
60ml咖啡酒 Khalua
2茶匙云尼拉香精 Vanila essence
60克无盐奶油 Unsalted butter
300克马斯卡芬乳酪 Mascarpone cheese

1包手指饼干 1pack lady fingers

上层装饰 Topping
适量可可粉 Some cocoa powder

做法 Method:
1。 在一个碗内 ,将咖啡粉,糖和热水溶化,加上酒搅匀置旁待用。
1. Mix the coffee powder, sugar and hot water in a bowl, then add in the kahlua and mix evenly.
2。  在一个中煲,放入鲜奶和糖,隔热水搅拌,糖溶化后,加入已溶化的ji'li'ding片(用冰水泡软,沥干),继续搅匀。再加入蛋黄,云尼拉香精和面粉。小火慢煮至浓稠幼滑。
2. Mix the milk and sugar in a pot, then double boil the mixture until the sugar dissolves completely. Add in the gelatin leaves(after softening it in ice water and then drained) and continue stirring. Add in the egg yolks, vanilla essence and flour. Cook it over a slow flame until it turns thick and smooth.
3。  另外,将马斯卡芬乳酪打至松发,待用。
3. Beat the marscapone cheese until fluffy.
4。  这时做法(2)开始浓稠,加入奶油搅匀,熄火后,加入做法(3)和酒,搅拌均匀成乳酪馅。
4. The mixture from (2) should be thick enough by now. Stir in the butter, then remove the pot from the flame and mix in the kahlua and (3) to form a cheese batter.
5。  将手指饼干,泡一层咖啡酒糖液,排放在一个8寸的圆形脱底模子,舖盖一层乳酪馅、再叠上第二层泡酒液的手指饼干,铺上剩余的乳酪馅。
5. Dip the lady fingers in the kahlua and remove quickly. Arrange the lady fingers in an 8 inch round cake mould. Next, cover the fingers with a layer of cheese batter, arrange some fingers on top of that layer and follow that with a final layer of cheese batter.
6。  放入冰箱冰置一晚。最后上面洒上一层可可粉即完成。   
6. Refrigerate in the fridge overnight. Spread a thin layer of cocoa powder on the cake before serving.
备注:
欲想看制作步骤图,请参阅这里
Tips:
Click this link for step by step pictures to make the cake.


相比2年前,孩子们也长大了,
识趣的安哥和安迪,切了些水果和订了披萨,
就出门gai gai(逛街)去,把整间家留给她们,随她们自由发挥。


 话说回来,当娜娜看到安迪准备着蛋糕时,为了避免她有所怀疑,
安迪还撒谎说,有蚂蚁来侵蚀我的手指饼干,
所以我被迫用掉来做提拉米苏,幸好单纯的她很好骗,
又让我顺利过关了。


手指饼干的绵密,咖啡酒的香醇
马斯卡芬乳酪馅的顺滑,可可粉的干爽,
这提拉米苏,当天可是好评如许。


 同样的食谱,也可以做成7寸方形或8寸圆形的蛋糕。
方形的做法看这里


@@@@@ Enjoy ! @@@@@

Related Posts Plugin for WordPress, Blogger...