2020年6月7日星期日

越南三明治专用火腿 (Vietnamese Bahn Mi Ham)


还记得安哥为了吃他思念已久的“咸鱼蒸猪肉”

兴奋地往猪肉档,杠回整3公斤的猪肉回来的故事吗?


今天安迪,
就是为了清猪肉而做了这“越式三明治专用的火腿”。


第一次尝试,
每个步骤都是跟着越南油管博主Morgane的分享。
如有不足的地方,还请前辈们多指教。


蒸好的火腿,需要一把锋利的好刀,
才可切成工整的薄片。


这是敬爱的大伯,
多年前给我买的火腿切片专用刀套。

他知道我对烹饪的热爱,
从澳洲给我带来这套价值不菲的刀套。

这是您的一份关爱,让我这个进门媳妇深感暖意。
谢谢,能成为安家的一员,
是我的福报满满,感恩哦🙏。


第一次尝试,红色素有点超标了。
下回再试,可以免掉色素或减少。

肉块也太厚。
可以的话,选购时,
请肉贩切薄一些的,方便卷裹的步骤。


 大致上,还算不错。
肉质软嫩多汁,充满五香粉的香气。

切片后的火腿,可以夹在三明治中,
可以是汤面的配料,
可以拿来炒饭,
可以加入沙律中当蛋白质,
可以是早餐,餐盘中的蛋白质来源。


越南三明治专用火腿
食谱参考 : Morgane

材料
五花肉  1 公斤 (8 X 10 x 1)cm

腌制料:
小洋葱  2粒,剁碎
蒜头      2瓣,剁碎
南乳      1块
南乳汁  1茶匙
绍兴酒  1茶匙
海鲜酱  1茶匙
酱油      1茶匙
五香粉  1茶匙
糖          1茶匙
盐          1/2茶匙
胡椒粉  1/4茶匙

适量的食用红色素
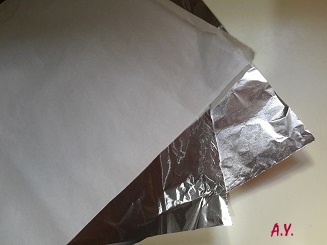
油纸(35cm x 50cm) 1张
铝箔  (35cm x50cm) 2张

做法  : 
1。 将五花肉洗净,抹干。刀切数纹,方便腌制入味。
2。 将五花肉皮,涂上一层食用红色素(随喜)。
3。 将所有的腌制料倒入一个碗内,搅拌均匀。以刷子蘸料,然后均匀的刷在五花肉上,盖上保鲜纸,冷藏冰箱腌制一晚。
4。  第二天早上,从冰箱取出腌制后的五花肉,将它卷成筒状,放到准备好的油纸,慢慢,紧紧的卷起来,两端往中间折封。
5。  再把做法(4)放到准备好的铝箔纸上,慢慢,紧紧的卷起来,两端往中间折封。重复同样的步骤一次。
6。  把裹了两层铝箔纸的五花肉送到滚水的蒸笼,中火蒸1小时30分钟。
7。  蒸好后的火腿,带完全冷却后,冷藏与冰箱一晚,以便定型。隔天就可以切片享用了。


五花肉  1 公斤 (8 X 10 x 1)cm
Pork belly 1 kg, (8 X 10 x 1)cm


适量的食用红色素
Some edible red coloring


腌制料
Marinated ingredients


油纸(35cm x 50cm) 1张, 铝箔  (35cm x50cm) 2张
Grease paper(35cm x 50cm) 1pcs , Aluminium foil  (35cm x50cm) 2pcs


把裹了两层铝箔纸的五花肉送到滚水的蒸笼,中火蒸1小时30分钟。
Arrange the step (5)'s pork belly into the boiling steamer,
 steam with medium flame for 1 hour 30 minutes. 

Vietnamese Bahn Mi Ham
Recipe refer to : Morgane

Ingredients :
Pork belly 1 kg, (8 X 10 x 1)cm


Marinated ingredients :

Shallot  2
Garlic   2clove
Red preserved beancurd      1pcs
Red preserved beancurd juice  1tsp
Shao Xing wine  1tsp
Hoisin sauce  1tsp
Soy sauce      1tsp
5 spices powder  1tsp
Sugar      1tsp
Salt         1/2tsp
Pepper  1/4tsp

Some edible red coloring

Grease paper(35cm x 50cm) 1pcs
Aluminium foil  (35cm x50cm) 2pcs


Method  :
1.    Clean and dry the pork belly. score few slits on the surface of the pork belly to enhance the marinating process.  

2.    Coated the pork belly's skin with edible red coloring. (Optional)

3.    Pour all the marinated ingredients into a bowl, mix well.  Brush the marinated gravy on the pork belly, cover with cling wrap and keep in the fridge one over night.

4.   In the next day morning, remove the marinated pork belly from the fridge, roll it into Swiss roll shape.  Place it on the grease paper, slowly and tightly roll it up.  Fold the two ends toward center and sealed. 

5.   Place the step (4) on an aluminium foil, slowly and tightly roll it up.  Fold the two ends toward center and sealed.  Repeat the steo one more time.

6.   Arrange the step (5)'s pork belly into the boiling steamer, steam with medium flame for 1 hour 30 minutes. 


7.  Remove the steamed ham from the steaming wok, keep it in the fridge after completely cool down. So it might fixed the shape and easy to cut for serving next day.


第二次尝试,
没有图上红色素,
肉块也选择比较薄的,
结果。。。。
就是如图片中的样子了。


猜猜, 接下来安迪是会用这个火腿做啥料理呢?


@@@@@@ enjoy! @@@@@@


2020年6月3日星期三

9寸巴斯克焦面乳酪蛋糕 (9" Basque Burnt Cheesecake )


已经整1年多,没烤过这个网红乳酪蛋糕了。

近来有点想念, 加上有网友问起9寸食谱。
所以就乘机考个9寸回味一下。


这蛋糕就是满满的乳酪和鲜奶油香气。
喜欢乳酪,鲜奶油的宝宝们,
一定无法说不。


加上做法简单。
甚至连鲜奶油都不必打发,就直接拌入面糊了事。
然后,还让你烤焦,爆脸,都不算犯规。


加上,成品香醇,美味可口;
难怪,引来一众粉丝,炸爆整个网络。
几乎每天都有人在搜寻此谱。

就以安迪之前分享8寸巴斯克焦面乳酪蛋糕来说,
已经有3x,xxx次数的点击率了。

加上其他人的分享,可想它的魅力有多厉害啊!


相比上回8寸的。
这回安迪刻意烤焦一些来比较以下。

还是那句,口味是很个人的。
我依然对金黄色情有独钟,
黑露露的,焦透透的,
还是留给有缘人好了。

除了不懂欣赏黑露露的外表,
也不喜欢带苦的味道。
(网上有人说,虽然烤焦了,一点都不苦,那是骗人的😥
今天,我证实了😜)


9寸巴斯克焦面乳酪蛋糕
9寸圆形烤盘
食谱参考  :这里

材料 :
625克     奶油乳酪,温室软化      
165克     细砂糖          
     4个    鸡蛋(B型)    
250克     动物性鲜奶油  
   17克    低筋粉              
     3克    粟米粉                

做法 : 
1.  预热烤箱190'C.  将烤盘铺上不沾盘油纸。
2.  将温室软化奶油乳酪与细砂糖,搅打至蓬松顺滑。
3.  加入一个鸡蛋拌匀后,再继续逐粒加入,拌匀。
4.  加入动物性鲜奶油,拌匀。
5.  加入筛过的低筋面粉和粟米粉,混拌成顺滑的面糊,倒入铺好油纸的烤模。
6.  送入预热烤箱 190度烤40分钟,转160度烤20分钟,最后调到上层,220度烤5分钟,以便表层呈现焦褐色即可。
7.  蛋糕出炉后,置放凉架上,待完全冷却,冷藏于冰箱4小时才享用。

温馨提点: 
~ 铺底的油纸,要用不沾性质的,以便容易脱模。
~ 烤箱温度和烘焙时间是随各家烤箱自做调整。
~ 表层的烧焦程度,也是随个人喜欢。 
~  可以用8寸圆形烤盘取代,成品会更高,好看。


混拌成顺滑的面糊,倒入铺好油纸的烤模。
gently fold into smooth batter,pour it into lined pan.


送入预热烤箱 190度烤40分钟,转160度烤20分钟,最后调到上层,220度烤5分钟,以便表层呈现焦褐色即可。 Bake with preheated oven at 190'C for 40 minutes,turn down to 160'C for 20 minutes, lastly switch the pan to upper lever, continue bake with 220'C for 5 minutes to have a burning look or dark brown in color for the surface,then done. 

9" Basque Burnt Cheesecake
9 "round pan
Recipe adapted from  :Here

Ingredints :
625g     Cream cheese,room temperature   
165g     Caster sugar    
     4      Egg(size B)    
250g     Whipping cream
  17g     Cake flour          
    3g     Corn flour     

Method : 
1.  Preheat oven at 190 'C.  Line the pan with non stick grease papper.
2.  Beat the room temperature cream cheese and caster sugar until smooth and fluffy.
3.  Add in 1 egg and beat to well mixed. continue to add in the balance egg one by one and beat to well mixed.
4.  Add in whipping cream, mix well.
5.  Add in sieved cake flour and corn flour, gently fold into smooth batter,pour it into lined pan.
6.  Bake with preheated oven at 190'C for 40 minutes,turn down to 160'C for 20 minutes, lastly switch the pan to upper lever, continue bake with 220'C for 5 minutes to have a burning look or dark brown in color for the surface,then done.
7.  Remove the cake from the oven, let it cool completely at the rack. Chill the cooled cake in the fridge for 4 hours to enjoy the better taste.


Tips :
~ Use the non-stick grease paper to easy the job of removing the cake from the pan.
~ The oven temperature and baking time can be vary oven to oven.
~ The burning surface of the cake can suit to  individual disired.
~  Can replace with 8 " round pan, the cake may turn out higher and nicer.


@@@@@@@ Enjoy! @@@@@@


2020年6月2日星期二

白玉菇派(White Beech Mushroom Pie)


三色菜最后的清仓。
然后勇敢的挑战竹篮纹派皮。


没想到,一个无心的三色菜清仓之举
赢来安哥的赞不绝口。

既然反应良好,那就乘胜追击。
继续烤香派好了。


这次不玩小派,玩起碟派。
并且是竹篮纹路和可爱的小花花派。

第一次编竹篮纹,
自觉边沿收口有待改善。
没关系,肯踏出第一步就是在进步当中了。
加油咯💪


虽然外貌不达标,但是内涵十足。
本来香酥的派皮,加上内馅鲜甜多汁,还有海鲜酱的加持。
果真,我很丑,但我很美味啊!!!!


白玉菇派
做1个8寸圆派或5个小派

派皮材料:
面粉 160g
盐 1/8tsp
奶油, 冷冻取出切块 90g
冷水 2Tbsp
柠檬汁 1tsp

派皮做法:
1. 将面粉和盐筛入一个大盆里, 加入冷冻牛油粒, 用手指尖把牛油松开拌 成面粉碎粒。

2. 先加入1Tbsp冷水和柠檬汁, 拌匀。 然后逐渐加入剩余的水份, 搓拌成圆面团。

3. 用保鲜纸包好, 放入冰箱冷藏25-30分钟。(面团重 : 290克)

***********************************************

馅料:

黄色洋葱 (切丁)1个
蒜头 (剁碎)2瓣
猪肉碎120g
冷冻三色菜(解冻) 100g
白玉菇 (切粒) 100g
高汤或清水 100ml

调味:
海鲜酱 1茶匙
盐 1/2茶匙
糖 1/2茶匙
黑胡椒粉 适量
粟粉 2茶匙

馅料做法:
1. 热油锅, 下洋葱炒至软, 加入蒜蓉爆香.。 加入肉碎翻炒至白, 下白玉菇粒,三色菜, 拌匀。 翻炒至白玉菇熟透。

2. 把2Tbsp的高汤或清水和2茶匙的粟粉拌匀, 备用。

3. 把剩余的高汤或水, 倒入白玉菇猪肉馅料中,大火煮滚, 加入调味拌匀,最后加入粟米水勾芡成浓稠的馅料。 把馅料舀入碗中, 待凉备用。


*******************************************

组合:
1. 冰箱取出面团,分割成180克和110克的大小面团。 工作台上撒些面粉,  然后将大面团(180克)搓圆,杆平,用模型切成派模大小。

2. 将面团再擀成较薄大,放入派模中, 用刀割出多余的面团, 用手轻压边缘, 用叉子在派底刺洞,上面放陶瓷珠(烤石), 放入预热200‘C的烤箱, 烤大概15-20分钟, 或直到边缘微黄色。

3. 从烤箱取出派皮,拿掉陶瓷珠, 放入馅料。将小面团(110克)杆成圆平的碟形,铺盖在上面, 沿边压紧收口, 用叉子在边缘按上花纹装饰。 涂上蛋液。(我随兴打起竹篮纹)

4. 放入烤箱, 继续烤20-25分钟, 或表面金黄色。


白玉菇
White beech mushroom


将面粉和盐筛入一个大盆里, 加入冷冻牛油粒, 用手指尖把牛油松开拌 成面粉碎粒。
加入1Tbsp冷水和柠檬汁, 拌匀。 然后逐渐加入剩余的水份, 拌成圆面团。 用保鲜纸包好, 放入冰箱冷藏25-30分钟。(面团重 : 290克)Sift flour and salt into a large mixing bowl. Add in the diced butter. Rub the butter into the flour with your finger tips, until the mixture looks like coarse breadcrumbs.  Add 1 tablespoons of the chilled water and lemon juice to flour mixture. Slowly add in the rest of the chilled water until the mixture become a smooth dough.  Wrap it with cling wrap and chill in fridge for about 25 to 30 minutes.  (Dough weigh : 290g)


冰箱取出面团,分割成180克和110克的大小面团。
工作台上撒些面粉, 然后将大面团(180克)搓圆,杆平,用模型切成派模大小。
将面团再擀成较薄大,放入派模中, 用刀割出多余的面团, 用手轻压边缘, 用叉子在派底刺洞,上面放陶瓷珠(烤石), 放入预热200‘C的烤箱, 烤大概15-20分钟, 或直到边缘微黄色。
Remove the dough from fridge.  Cut the dough into 2 portion. one is weigh 180g and another one is 110g. 
Place the bigger dough (180g) on a lightly floured surface.  Flatten it with rolling pin . Use the pie mould to cut the dough into the pie mould shape.
Use rolling pin to roll on the dough to be thinner and bigger. Fit in the dough into pie mould and trim the edge. (Save the trimmed dough for decoration). Prick the base with a fork. Place some ceramic beads on top(I omitted it cause I don't have) . Transfer to the preheated oven for blind-baking, about 15 to 20 minutes, until the edge becomes lightly brown.


从烤箱取出烤好的派皮,拿掉陶瓷珠, 放入馅料。将小面团(110克)杆成圆平的碟形,铺盖在上面, 沿边压紧收口, 用叉子在边缘按上花纹装饰。 涂上蛋液。(我随兴打起竹篮纹)Remove the pie shell from oven.  Spoon the fillings into the pie shell and cover with the dough disc. Crimp the edges to seal and score the top pastry. Use the trimmed dough for decoration. Egg wash the pie. (I try to beautify it with basket print)


White beech Mushroom Pie
yield one 8" round pie

Or 5 small pies

Ingredients of pastry

160 gm plain flour
1/8 tsp salt
90 gm chilled unsalted butter, diced
2 Tbsp iced water
1 tsp freshly squeezed lemon juiceIngredients of fillings:


Method :

1.  Sift flour and salt into a large mixing bowl. Add in the diced butter. Rub the butter into the flour with your finger tips, until the mixture looks like coarse breadcrumbs.

2.  Add 1 tablespoons of the chilled water and lemon juice to flour mixture. Slowly add in the rest of the chilled water until the mixture become a smooth dough. 


3.  Wrap it with cling wrap and chill in fridge for about 25 to 30 minutes. (Dough weigh : 290g)


*****************************************

Filling:

Yellow Oniaon 1, diced

Garlic 2 cloves, chopped
Minced meat 120g
Frozen mixed vegetable 100g,defrost 
White beech mushroom 100g, cut into small pieces
Broth or water 100ml

Sesoning:

Hoisin suace 1tsp
Salt 1/2tsp
Sugar1/2tsp
Some black pepper
Corn flour 2tsp

To make fillings:
1. Heat up  oil, saute the onion until softened and garlic until fragrant. Add in minced meat , saute until pale in color. Add in White beech mushroom and mixed vegetable. Cook until the mushroom turns soft.
2. In the meantime, mix 2 tablespoons of broth or water with 2 teaspoons of cornflour. Set aside.


3. Pour in the rest of broth or water into the mushroom and meat mixture. Bring it to a boil. Add in seasoning, stir evenly .Lastly thicken the gravy with cornflour water. Turn off the heat. Transfer the fillings into a bowl and let it cool for a while.


*************************************************


To assemble and bake the pie:

1.  Preheat oven to 200'C.

2.  Remove the dough from fridge. Cut the dough into 2 portion, one is weigh 180g and anothe one is 110g.  
Place the bigger dough (180g) on a lightly floured surface.   Flatten it with rolling pin . Use the pie mould to cut the dough into the pie mould shape.

3.  Use rolling pin, roll on the dough to be thinner and bigger. Fit in the dough into pie mould and trim the edge. (Save the trimmed dough for decoration). Prick the base with a fork. Place some ceramic beads on top(I omitted it cause I don't have)  . Transfer to the preheated oven for blind-baking, about 15 to 20 minutes, until the edge becomes lightly brown.


4.  Remove the pie shell from oven. Take away the beads.  Spoon the fillings into the pie shell. Flatten the small dough(110g)into disc shape and use it to cover the pie shell. Crimp the edges to seal and score the top pastry.  Egg wash the pie. ( I try to beautify with basket print)
Bake in the preheated oven, for about 20 to 25 minutes, until golden. Serve hot.


真的好好吃😋😋😋,
一出炉不久,稍微冷却,
安哥一个人就消化半碟派了。

碍于健康,安迪不让他再吃,
第二天早上,微波炉叮一叮,
依然美味可口。


@@@@@@ Enjoy! @@@@@


2020年6月1日星期一

番薯绿豆糖水(Green bean with sweet potato T'ang Shui)


 向来出现在安家的糖水,都是红豆汤较多。
其一是因为老人家常说红豆补血。
又说绿豆寒凉。
所以家里就很少买绿豆。
自然就很少煲绿豆汤了。


托Ketua rumah 的福,
心血来潮的抱回一包500克装的绿豆。

见豆思故友。
想起年轻时,出来KL工作,与一班友人合租房子。
其中一位女室友,就曾经煮过这道番薯绿豆汤。

当时对我们这班烹饪门外汉的大伙,
这可是美味得不得了,大家都吃得津津有味😋😋


番薯绿豆糖水
供 3 - 4人

材料:
绿豆   150克,洗净沥干
番薯   100克,去皮切丁
白木耳     10克,泡软撕成小朵
水        1200毫升
香兰叶。 3叶

黄糖       50克
盐           少许

做法 : 
1. 在一个大煲内,注入水,下绿豆,煮滚, 关火,焖15分钟。重复煮滚后,再次关火,焖15分钟。
2.  经过两次的焖煮软绿豆后,加入番薯丁,中火煮15分钟。
3.  加入泡软白木耳,继续中火煮10分钟。
4.  最后,调入黄糖和少许的盐即可享用。


Green bean with sweet potato T'ang Shui
for 3 - 4 persons

Ingredients :
Green bean   150g, cleaned and drained
Sweet potato   100g , diced
White fungus     10g ,soak and floret
Water       1200ml
Pandan leaf 3 leaves

Brown sugar       50g

Some salt


Method : 
1. In a big pot, pour in the water and green beans, cook to boil, turn off fire and simmer with lid on for 15 minutes. Repeat the same steps.
2.  After twice simmering process, the green beans should be soft, now add in diced sweet potato, cook with medium flame for 15 minute.
3.  Add in soaked white fungus floret, continue to cook for another 10 minutes.
4.  Lastly, stir in brown sugar and salt. 


凭着微薄的记忆,今天,我把它复煮出来。
这看起来粗糙的绿豆汤,却是。。
吃的是美好的年少无知,
喝的是动人的单纯情谊。
真。 善。美。


记忆中,室友好像是放椰糖,
我家椰糖缺货,只好以黄糖取代。
不然会更加香甜美味。


绿豆有排毒利尿功效。
番薯可以减肥和抑制癌细胞生长。
白木耳滋阴作用。
一道养身又美味的糖水。


@@@@@ Enjoy ! @@@@@


Related Posts Plugin for WordPress, Blogger...