2020年6月21日星期日

银宝牛油蛋糕 (Lurpak Butter cake)


今天安迪与大家分享一款大有来头的奶油,

有着优良品质的银宝,
实至名归的蝉联两届世界冠军奶油的记录。
有关报道,请参阅 : 这里


近来,蛋糕材料店里,
意外发现银宝(Lurpak)牛油竟然便宜过安佳(Anchor).
因此,趁机进了一批银宝牛油。


昨晚临睡前,决定给安哥烤个蛋糕庆“父亲节”。
知道他对牛油蛋糕情有独钟,
于是就就来个就地取材,
烤个香喷喷的银宝牛油蛋糕好了。


果然,烤箱里的牛油蛋糕,近烤好时,
那香气。。。。。
浓郁到。。。。。香醇到。。。。
让人迫不及待!!!


银宝牛油蛋糕
烤模 : 2个 (3 x 8)寸长方形
          或1个 (5 x 9)寸 长方形

材料:
鲁帕有盐牛油    250克
黄糖        200克
鸡蛋            4个(带壳约 240克)
香草精        1 1/2茶匙
低筋粉        250克
发粉           3/4茶匙
牛奶            25克

做法:
1。 预热烤箱170'c
2。 将牛油搅打至松发,加入黄糖,继续搅打至顺滑。
3。 加入鸡蛋,徐徐拌匀后再逐粒加入鸡蛋,直到完成4个鸡蛋,加入香草精,加入牛奶,搅拌均匀。
4。  徐徐的拌入低筋粉,拌匀。
5。  最候倒入烤模,送入预热烤箱170'c,烤约45分钟或插入竹签

温馨分享:
~ 牛油置放温室,手摸微硬即可搅打。


银宝品牌 (Lurpak),
始于1901年丹麦,Arla Foods旗下.
世界上颇具盛名的黄油品牌,
以两个盘绕的鲁尔角为标志

Lurpak Butter Cake 
Baking tray : 2 (3' x 8') rectangle tray
                    or 1 (5 'x 9') rectangle tray

Ingredients :

250g         Lupak butter   
200g         Brown sugar        
4                Egg(with shell 240g)
1 1/2tsp     Vanilla essence   
250g          Cake flour       
3/4tsp        Baking powder          
 25g           Milk

Method :
1.  Preheat oven to 170'C 

2.  Beat the butter till light and fluffy, add in brown sugar, continue beating until smooth and even.

3.  Add in 1 egg each time after well mixed until finished all the eggs. Add in vanilla essence ,add in milk and mix well.

4.  Slowly add in cake flour, mix well.

5.  Lastly pour the batter into the appropriate baking tray, bake with preheated oven at 170'C, about 45 minutes or with the skewer tester come out from the cake is clean.


Tips sharing:
~ Place the butter at room temperature, when it is  still slightly hard, can start to beat it.


蛋糕体松软湿嫩,奶油香醇无比,
吃着,吃着,
莫名的幸福,洋溢四方。


愿大家,有个愉悦的父亲节。
愿天下粑粑们,喜悦安康,
辛苦你们了,
父亲节快乐!


@@@@@ Enjoy! @@@@@


2020年6月14日星期日

香兰咖喱包 (Pandan Curry Buns)


蒸包子,易学不易精。
从包体的松软但不粘牙的要求,
好看的包纹捏法,
发酵时段的刚好,
蒸煮的时间,以便出炉纹路鲜明。
这些都得经过不断的琢磨,才能掌握。


今天,我又来尝试,(不用市场专卖的包子粉),自己调配普通面粉。
刻意比上回多用一些低筋粉,
结果口感较沾牙,个人较不喜欢。


所以,以下的食谱是根据上回黑白木耳沙葛包呈现。
因为上回的口感是我喜欢的松软但不粘牙的。


包纹感觉不错,应该是捏多有功吧!
果然勤能补拙💪


咖喱包子,辛香开胃的内馅固然不可缺。
好吃! 好好吃!


香兰咖喱包
共做 11个

馅料:
马铃薯 300g(切小颗粒,蒸约8分钟)
洋葱 1/2颗
鸡肉丁 150g(事先用1tbsp咖喱粉腌)
肉类咖喱粉 1tbsp
辣椒粉 1/2tbsp
咖喱叶 3束
油 3汤匙
清水 适量
盐 适量

包皮材料
A:
4克 即溶酵母
50克 清水
*使用前混合均匀


B :
250克 面粉
  50克 低筋面粉

  25克 细砂糖
  50克  浓缩香兰液
 55克 水
1/8茶匙 双倍发粉
10克 玉米油

做法 :

1。馅料:锅中热油,加入咖喱叶及洋葱炒香,加入鸡肉丁炒至变白。加入马铃薯粒、咖喱粉和辣椒粉,炒匀。加适量清水焖煮一会儿,最后加盐调味即可。(馅料要焖得干身,这样才容易包馅; 调味料要下得重一点,就是吃到是咸的那种,不然之后会觉得太淡)

2。皮料 : 将B料放入大碗内,倒入A料拌匀,倒在桌面用手搓数分钟至光滑面团。盖上湿布,发酵30分钟,然后分割成每份45克。

3。 取1 份小面团,压扁,以杆面棍将周边杆薄,包入1大匙馅料,捏成包形状,底部垫纸,排放在蒸笼里,发酵30分钟。

4。 锅里煮好滚水,排好架子及铺块白布,排入(4)后盖好,以中火蒸9分钟或熟即可。


Steam Pandan Curry Paus
Yield 11 paus
Recipe refer : Karipap, Black and White fungus Yambean Paus

Filling :
Potato 300g(diced, steam for 8 minutes)
Onion 1/2
Diced chicken meat 150g(marinated with 1 Tbsp curry powder)
Curry powder 1tbsp
Chili powder  1/2tbsp
Curry leaf 3 stalk
Oil 2 Tbsp
Some water
Some salt

Dough:
A:
4g Instant yeast
50g water
*Mix well before using

B :
250g plain flour
  50g cake flour

25g caster sugar
50g concentrated pandan juice
55g  water
1/8tsp double -action baking powder
10g corn oil


Method :

1.  Heat up oil, saute the onion and curry leaves until fragrant, add in diced chicken meat, saute it until pale in color.  Add in diced potatoes, curry powder and chili powder, stir well.  Add in some water to simmer 2 minutes, finally season with some salt to desire taste. (the filling is good to be a bit dried so that easy for the wrapping job).

2. For skin:  Combine the ingredients (B) in a big mixing bowl. Add in ingredients (A), mix well. Place it on a tabletop. Knead with your palms for few minutes till the dough becomes shiny and soft. Return the dough back to the bowl, cover with a damp cloth. Proof for 30 minutes, then divide the dough into 45 g each.

3.   Press one of the small dough, use rolling pin to roll around the edge, wrap with 1 Tbsp filling and shape it into Pau shape. Put piece of paper underneath the Leaf-shaped buns and arrange them into the steaming tray and rest for 30 minutes.

4. Bring water to a rapid boil in a wok, then place a steaming rack in the wok. Cover the inside of the wok lid with a cloth(to prevent the water droplets from dripping onto the paus). Arrange no.(4) on the steaming rack. Cover the wok and steam over medium heat for 9 minutes or till thoroughly cooked.


相比上回的咖喱包,不但没用包装包子粉,
也没用上商业香兰精华液。

是新鲜的自家搅拌的香兰液,
不但颜色较鲜亮,味道也富有香兰叶的自然香气。


今天的帖子呈现有些许不一样。
因为有关单位把部落格呈现方式给更新。

一时间,难于适应。
这个简单的贴,单单上载照片都耗掉不少时间。


虽是小小的变动,却带来不便。

好比人生,偶尔的突发状况,总是令人措手不及,难于适应。
但是,逃避是无法解决问题的。
唯有克服内心的排撤,
接受,改变,适应,继续进步。


@@@@@ Enjoy ! @@@@@@

2020年6月8日星期一

越式三明治 (Banh Mi)


越式三明治,越南人称Banh Mi,
是越南经历法國殖民百年后的传承。


一口咬下,你会听到动听的脆声,
内陷在你嘴里起舞💃🏻,嘴里还会尝到淡淡迷人的面包香。

它绝对是法国美食与越南道地食材的神奇组合👍


越南三明治主要的食材有四点:
主要灵魂,外脆内软的越式法棍,
肉类,越式腌制萝卜丝和蔬菜,和猪肝酱。


内馅材料丰富的越式三明治,
是它赢得许多食客青睐的原因之一。


第一种是肉类:可以是一片片的猪肉、肉丸、烤猪肉或牛肉、火腿、越南扎肉等等。 


第二种是蔬菜:通常是新鲜青瓜、越式腌萝卜丝、腌青木瓜、香菜、洋葱、番茄等。 


酱料和配料:有猪肝酱、辣椒酱、蛋黄酱、番茄酱、芝士、海鲜土豆酱、胡椒粉等。


越式三明治
两人份

材料:
越式法棍    2条
越式法棍专用火腿片  200克, 或以其他肉片取代

适量的:
蔬果
海鲜土豆酱,或以其它酱取代
芝麻酱

组合 :
1. 取一条法棍, 入烤箱,200度烤5分钟,将表皮烤脆。 
2. 将烤脆法棍横切开,两片各自涂上一层海鲜土豆酱。(可以换上自己喜欢的酱)
3. 叠上青菜,青瓜,火腿,浇上一点芝麻酱。
4. 叠上番茄,越式腌制红白萝卜丝,青菜。。。等(随喜)
5. 最后盖上另一半法棍,就可享用。


*海鲜土豆酱
材料:
马铃薯泥    120克
蒜蓉          1汤匙
海鲜酱      2汤匙
油              3汤匙
适量盐和胡椒调味

~  热油,爆香蒜蓉,转小火,下马铃薯泥和海鲜酱,炒匀,调味即可。


越式三明治的组合
Banh Mi assembling


Banh Mi
for 2 pax

Ingredients:I

Vietnamese baguette   2
Vietnamese Banh mi ham  200g or others meat

some :
Greens
Hoisin  potato paste or others sauce 
Sesame suace

Assemble :

1. Toast a Vietnamese baguette in oven at 200‘C for 5 minutes.
2.  Remove the crispy baguette from the oven. Cut it into 2 pieces. Spread the Hoisin potato paste on them. ( can replace any sauce or paste if you like )
3.  Top on some greens, cucumber, hams and drizzle some sesame sauce.
4.  Top on some tomato slices, Vietnamese Diakon and carrot pickles, greens.........and so on(to your own liking).
5.  Finally, sandwich it with the other half of the baguette and done 


*Hoisin potato paste

Ingredients:
Mashed potato    120g
Chopped garlic          1Tbsp
Hoisin suace      2Tbsp
OIl              3Tbsp
Some salt and pepper

~ Heat up oil, turn to low flame, pour in mashed potato and Hoisin sauce, saute evenly. Season with salt and pepper to desire taste.


家里没有猪肝酱,也没有蛋黄酱,
所以就地取材,来个海鲜土豆酱。
你可以随自己喜欢调配喜爱的酱料。
主要是要有酱汁,这样吃起来比较湿润美味。


第一次尝试,难免有很多不足。
比如,下次可以加入法国猪肝酱。
腌制红白萝卜丝,不要刨的,用切的,口感会更棒。
面包皮的脆度可以更高一些。

没关系,
不完美等于拥有再尝试的机会。✌


来吧,喜欢Banh mi 的朋友们,欢迎一起研究。
如果你有好吃的越式法棍食谱,
不妨与我分享。


@@@@@ Enjoy!@@@@@@


越式腌红白萝卜丝(Vietnamese Daikon and Carrot Pickles)


这个清爽脆口的腌制萝卜丝,
不单是制作越式三明治(Banh Mi)的主要配菜。

也是许多越是料理中的配菜。
搭配在肉堆中,清爽消腻,连带提升料理的美味。


越式腌红白萝卜丝

材料:
紅萝卜 100克 (刨丝)
白萝卜 150克(刨丝)
盐1 /2茶匙
白米醋 75ml
温水 1/2杯
糖 1大匙

做法:
1.将紅白萝卜丝放入碗中,加入盐搅拌均勻。腌漬約5分钟,或至萝卜軟化。
2.将红,白萝卜丝用清水清洗,沥干。
3.糖、白米醋和溫水倒入碗中混合,搅拌至糖溶化。将虹,白萝卜丝加入,拌勻。
5.將拌匀好的萝卜丝倒入瓶子中,放入冰箱腌漬隔夜即可。冷藏可保存4-5星期。


Vietnamese Daikon and Carrot Pickles

Ingredients:
100g Carrots (julienne
)
150g Radish (julienne)
1/2tsp Salt
75ml White rice vinegar
1/2cup Warm water
1tbsp Sugar


Method:
1. Place the julienne carrots and radish in a large bowl, sprinkle with salt and mix well. Marinate about 5 minutes or until the carrots and radish turn soft.
2. Transfer the julienne carrots and radish to a colander, rinse with cool water and drain well.
3. In another bowl, mix together sugar, white rice vinegar and the warm water, until the sugar dissolves.
4. Add julienne carrots and radish in, and stir well.
5. Pack the julienne radish and carrots tightly into the jars. Pour over the pickling liquid to cover. Seal and refrigerate at least overnight. They should last 4 to 5 weeks in the refrigerator.


此腌制萝卜丝,除了配搭于越式三明治,
普通早餐,餐盘内也可以添上一,两丛,
好看有平衡营养的摄取。


@@@@@@ Enjoy ! @@@@@@


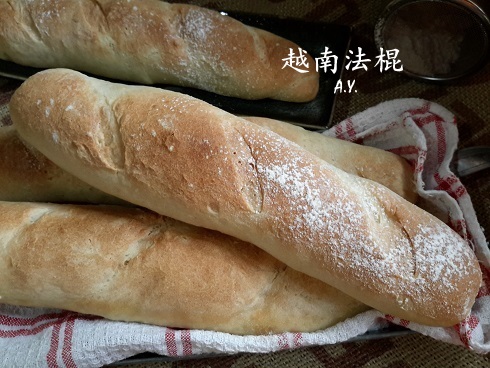
越南法棍(Vietnamese Baguette)


一次外用午餐,尝过好好吃的越式三明治或越语称之Banh Mi.
心里就一直想要挑战这令我难忘的美食。

居于不同国度的文化,食材的涉及也不一样,
比如其中所用的面包,必需是外脆内软,
特制的越式火腿,越式腌白,红萝卜丝,
猪肝酱。。。。。等

加上家里也没有烤法棍专用波浪形烤盘
所以就耽搁了好久,好久。


前几天,走访了琳达公主的部落格,
无意间发现了一项新烤法。
*湿毛巾蒸汽法 ~  是针对越式法棍外脆内软的烤法。

引起了好奇心🤔
于是,开炉探究竟咯🤞


结果,
面包体是软的,
面包皮也是硬脆的,敲打时,也是咯咯响!


但是,
硬脆度很快因为空气间的潮湿,就软韧了。
想要吃到像越式餐馆里, 脆脆香香的面包口感,
就得再烘烤一次。


越南法棍
食谱参阅 : 琳达公主
可做4条(长25cm) 的法棍

材料 :
高筋面粉 260克
粘米粉 70克
即溶酵母 3克
盐 6克
糖 10克
水 210克
奶油 10克


做法:
1。 将所有材料(除了奶油),放入面包搅拌机搅拌成团, 加入奶油继续搅拌成光滑就好。

2。 盖上湿布,发酵1小时或至1倍大。

3。 将面团平均分割3等份,滚圆,用布盖上,休面20分钟。

4。 用擀面棍擀平再卷成长条形。排放在烤盘上,盖上湿布,进行最后发酵至两倍大(约50分钟)

5.    在面包表层,用利刀割数刀,表皮喷些水,放入预热烤箱230°C,用*湿毛巾蒸汽法,烤10分钟。

6。 取出毛巾烤盘,减低烤箱温度至200°C,继续烤15分钟或成金黄色即可。


*湿毛巾蒸汽法
烤盘内放毛巾加水,水不要太多,盖过毛巾即可。烤箱預熱好的五分鐘前,放入毛巾烤盤,加热到沸腾(约5分钟),然后放入面团一起烤15分钟。


Vietnamese Baguette
Recioe adapted from : 琳达公主
Yield 4 (25cm) Vietnamese Baguette

Ingredients :
Bread flour 260g
Rice flour 70g
Instant yeast 3g
Salt 6g
Sugar 10g
Water 210g
Butter 10g

Method :
1. Put all the ingredients except butter into the bread maker and turn it on to mix them into a dough.  Add in the butter and continue to knead the dough until it becomes shiny .

2.   Cover with damp cloth and ferment the dough for 1 hour or until double the size.

3.   Devide the dough into 3 equal portion . Roll them into ball shapes. Cover with damp cloth and rest for 20 minutes.

4.   Use rolling pin to flatten it and roll it into cylinder shape. Arrange it on the baking tray. Cover with cloth and allow final proofing for about 50 minutes or double the size.

5.   Make a few scoring and spray some water on the dough surface, use *Wet towel steaming method bake with preheated at 230°oven for 10 minutes.

6.  Remove the towel baking tray from the oven , reduce the oven temperature to 200°C,continue to bake for another 15minutes or until golden brown in color.

*Wet towel steaming method 
Place a towel into a baking tray, add in water, the water lever just cover the towel. 
5 minutes before the oven preheated process completed, place the towel baking tray into the oven, heat it until steam come out(about 5 minutes), then only put in together the baguette dough to bake for 15 minutes.


虽然,距离印象中的越式法棍口感,还是有一段距离。
或许是我个人的烤箱温度有关。

无论如何,还是要谢谢博主的用心分享🙏
除了湿毛巾蒸汽法以外,
她也分享了好几个她经历后失败的经验。
实属难得,部落格有如此无私的博主!

谢谢,
这对我们新人来说,无疑是少走许多冤枉路了。
感恩!🙏


@@@@@ Enjoy! @@@@@

2020年6月7日星期日

越南三明治专用火腿 (Vietnamese Bahn Mi Ham)


还记得安哥为了吃他思念已久的“咸鱼蒸猪肉”

兴奋地往猪肉档,杠回整3公斤的猪肉回来的故事吗?


今天安迪,
就是为了清猪肉而做了这“越式三明治专用的火腿”。


第一次尝试,
每个步骤都是跟着越南油管博主Morgane的分享。
如有不足的地方,还请前辈们多指教。


蒸好的火腿,需要一把锋利的好刀,
才可切成工整的薄片。


这是敬爱的大伯,
多年前给我买的火腿切片专用刀套。

他知道我对烹饪的热爱,
从澳洲给我带来这套价值不菲的刀套。

这是您的一份关爱,让我这个进门媳妇深感暖意。
谢谢,能成为安家的一员,
是我的福报满满,感恩哦🙏。


第一次尝试,红色素有点超标了。
下回再试,可以免掉色素或减少。

肉块也太厚。
可以的话,选购时,
请肉贩切薄一些的,方便卷裹的步骤。


 大致上,还算不错。
肉质软嫩多汁,充满五香粉的香气。

切片后的火腿,可以夹在三明治中,
可以是汤面的配料,
可以拿来炒饭,
可以加入沙律中当蛋白质,
可以是早餐,餐盘中的蛋白质来源。


越南三明治专用火腿
食谱参考 : Morgane

材料
五花肉  1 公斤 (8 X 10 x 1)cm

腌制料:
小洋葱  2粒,剁碎
蒜头      2瓣,剁碎
南乳      1块
南乳汁  1茶匙
绍兴酒  1茶匙
海鲜酱  1茶匙
酱油      1茶匙
五香粉  1茶匙
糖          1茶匙
盐          1/2茶匙
胡椒粉  1/4茶匙

适量的食用红色素
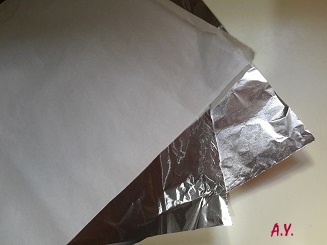
油纸(35cm x 50cm) 1张
铝箔  (35cm x50cm) 2张

做法  : 
1。 将五花肉洗净,抹干。刀切数纹,方便腌制入味。
2。 将五花肉皮,涂上一层食用红色素(随喜)。
3。 将所有的腌制料倒入一个碗内,搅拌均匀。以刷子蘸料,然后均匀的刷在五花肉上,盖上保鲜纸,冷藏冰箱腌制一晚。
4。  第二天早上,从冰箱取出腌制后的五花肉,将它卷成筒状,放到准备好的油纸,慢慢,紧紧的卷起来,两端往中间折封。
5。  再把做法(4)放到准备好的铝箔纸上,慢慢,紧紧的卷起来,两端往中间折封。重复同样的步骤一次。
6。  把裹了两层铝箔纸的五花肉送到滚水的蒸笼,中火蒸1小时30分钟。
7。  蒸好后的火腿,带完全冷却后,冷藏与冰箱一晚,以便定型。隔天就可以切片享用了。


五花肉  1 公斤 (8 X 10 x 1)cm
Pork belly 1 kg, (8 X 10 x 1)cm


适量的食用红色素
Some edible red coloring


腌制料
Marinated ingredients


油纸(35cm x 50cm) 1张, 铝箔  (35cm x50cm) 2张
Grease paper(35cm x 50cm) 1pcs , Aluminium foil  (35cm x50cm) 2pcs


把裹了两层铝箔纸的五花肉送到滚水的蒸笼,中火蒸1小时30分钟。
Arrange the step (5)'s pork belly into the boiling steamer,
 steam with medium flame for 1 hour 30 minutes. 

Vietnamese Bahn Mi Ham
Recipe refer to : Morgane

Ingredients :
Pork belly 1 kg, (8 X 10 x 1)cm


Marinated ingredients :

Shallot  2
Garlic   2clove
Red preserved beancurd      1pcs
Red preserved beancurd juice  1tsp
Shao Xing wine  1tsp
Hoisin sauce  1tsp
Soy sauce      1tsp
5 spices powder  1tsp
Sugar      1tsp
Salt         1/2tsp
Pepper  1/4tsp

Some edible red coloring

Grease paper(35cm x 50cm) 1pcs
Aluminium foil  (35cm x50cm) 2pcs


Method  :
1.    Clean and dry the pork belly. score few slits on the surface of the pork belly to enhance the marinating process.  

2.    Coated the pork belly's skin with edible red coloring. (Optional)

3.    Pour all the marinated ingredients into a bowl, mix well.  Brush the marinated gravy on the pork belly, cover with cling wrap and keep in the fridge one over night.

4.   In the next day morning, remove the marinated pork belly from the fridge, roll it into Swiss roll shape.  Place it on the grease paper, slowly and tightly roll it up.  Fold the two ends toward center and sealed. 

5.   Place the step (4) on an aluminium foil, slowly and tightly roll it up.  Fold the two ends toward center and sealed.  Repeat the steo one more time.

6.   Arrange the step (5)'s pork belly into the boiling steamer, steam with medium flame for 1 hour 30 minutes. 


7.  Remove the steamed ham from the steaming wok, keep it in the fridge after completely cool down. So it might fixed the shape and easy to cut for serving next day.


第二次尝试,
没有图上红色素,
肉块也选择比较薄的,
结果。。。。
就是如图片中的样子了。


猜猜, 接下来安迪是会用这个火腿做啥料理呢?


@@@@@@ enjoy! @@@@@@