2015年11月28日星期六

泰式芒果鸡 (Thai Style Mango Chicken)


总是觉得时间跑得好快!
刚刚才说月初小拇指的芒果列车才启动,
如今又闻芒果列车近尾声了。
这一趟,最后一度与好姐妹相约同贴,
以这道“芒果鸡”搭上最后一班列车,
拜拜小拇指!咱们明年再见了!


鲜甜香脆的炸鸡块,
淋上酸酸甜甜的泰国辣椒酱,
再搭上新鲜爽口的瓜果丝,
色,香,味具备!

一口接一口,一块又一块,
很快的又见盘底了!
就是口感丰富,美味可口,
好吃!


泰式芒果鸡 
供3-4人份
食谱参考 : Kitchen Chaos

材料 :
4副全鸡腿,去骨留皮
2茶匙酱油
2茶匙麻油
适量的胡椒粉
 

混合面粉(筛过,混合均匀)
6 汤匙面粉
1茶匙 发粉
1/2 茶匙盐
1个蛋,稍微打散
适量的炸油
 

芒果沙律(混合均匀)
1个中型青芒果,切丝
1个中型大葱,切丝
1/2 条青瓜,去籽切丝
2条指天椒,剁碎
 

甜辣椒酱:
1茶匙蒜蓉
1茶匙葱头仔
1汤匙 香茅蓉
1汤匙柠檬汁
8汤匙 泰国辣椒酱
1茶匙食油
 

做法: 
1。以纸巾抹干洗净鸡腿。以酱油,麻油,胡椒粉涂抹在鸡腿上,冷藏于冰箱腌制最少2小时。
 

2。 用一个小煲,热油,爆香蒜蓉和葱头仔蓉,倒入香茅蓉,炒香。这时,加入柠檬汁和泰国辣椒酱拌匀,铲起待用。
 

3。 蛋放入一个碗里打散。混合面粉在一个深盘里拌匀。从冰箱取出鸡腿,先在蛋碗里沾透,再移至混合面粉盘里翻裹上一层面粉。

4。 炸锅里,热油,轻轻的放入裹粉鸡腿,中火炸至金黄色。捞起置凉架上约8分钟。
 

5。 再次热油锅,放入刚才的炸鸡腿,快速炸脆(约1分钟),捞起置凉架。待冷却后,切块摆在盘里。
 

6。 淋上甜辣椒酱,最后铺上芒果沙律即可享用。


Thai Style Mango Chicken
Serves 3-4 
Recipe adapted from : Kitchen Chaos

Ingredients :
4 chicken thighs, deboned and fat removed leaving skin on
2 tsps light soy sauce
2 tsps sesame oil
dash of white pepper powder

Batter (sifted together to mix well)
6 heaped tbsps all-purpose flour
1 tsp baking powder
1/2 tsp salt 
1 egg, beaten lightly
Oil for deep frying

Mango salad (mixed well together)
1 medium green mango, finely shredded
1 medium red onion, finely shredded
1/2 cucumber, finely shredded
2 birds eye chilies, finely chopped

Sweet chili sauce
1 clove of garlic, minced
1 shallot, minced
1 tbsp finely chopped lemon grass
1 tbsp lemon juice
8 tbsps thai sweet chili sauce
1 tsp of cooking oil

Mehtod :
1. Pat dry the cleaned chicken thighs with paper towels. Marinate them thoroughly with soy sauce, sesame oil and white pepper powder. Leave refrigerated for at least 2 hours.

2. In a saucepan, heat up oil saute the minced garlic and shallot until fragrant, add in the chopped lemongrass and stir well. Stir in the lemon juice and the thai sweet chili sauce and mix everything well. Once heated up, remove from heat and reserve them for later use.
 

3. Heat up enough oil in the wok. Combine the frying batter in a deep dish, and prepare the beaten egg in a separate bowl next to the batter. Dip the marinated chicken thigh first in the egg, then transfer it to the batter coating evenly, shaking off excess flour.
 

4. Gently lower the the battered chicken into the hot oil, one at a time, and let fry undisturbed.

5. Once the chicken thighs have turned golden brown, remove them from the work and rest them on a cooling rack for 8-9 minutes. Return them into the hot oil, frying them the second time for a crispier crust. The second round of frying will only take about a minute or two.
 

6. Drain the oil, and again leave the chicken thighs to cool down on the rack (cutting them while they are hot from the wok will break the crust easily). When ready, slice the chicken into strips.
 

7. Drizzle the sweet chili sauce over the sliced chicken and scatter with the mango salad.


水果蛋糕 (Fruit Pastry Cake)


 认识安迪的人都知道安迪喜欢过圣诞。
每年这个时候,安迪总会把在储藏室冬眠的圣诞树给挖出来,
然后把它装饰得亮丽耀眼,
再一边听圣诞乐曲,一边翻阅圣诞食谱,
很自然的就沉浸在浓浓的圣诞木里了。


看着冰箱,一盒盒的剩余水果,
想到Ann家的水果蛋糕,五颜六色,缤纷绮丽!
即可以清仓,又可以为来着的圣诞料理暖暖身。


大量的杏桃,草莓奇异果和蓝莓近铺满整个蛋糕面。
意外的构成一幅好看的图样。


切片后的蛋糕,浓郁的水果香气散发四方。
吃进口里时,香滑的蛋糕体和各色莓果,口感丰富,齿颊留香!


撒上糖霜的蛋糕,仿佛雪霜覆盖,
加上华丽的莓果装饰,是不是很有圣诞feel叻?
哈。。。。。。。。又来自我陶醉!


水果蛋糕
食谱参考 : Anncoo Journal
用料:
100克 牛油,室温软化
150克 幼糖
2 汤匙 酸奶油
3 个 鸡蛋, 轻轻搅打 (全蛋越70克一个)
1茶匙 香草精
1 汤匙 柠檬汁和从一粒柠檬取出的柠檬屑
210克 面粉,过筛
1茶匙 泡打粉
适量的罐头杏桃片,草莓,蓝莓,奇异
糖霜适量


做法

1。 取9寸蛋糕模,在内壁涂上一层牛油,再撒上面粉,底部铺上烘焙纸。
2。 把牛油,幼糖及酸奶油搅打至蓬松轻盈状。慢慢加入蛋液搅打至与面糊完全融和。混合物出现些微凝结现象。
3。 加入香精,柠檬汁及柠檬屑。接着倒入面粉和泡打粉。用橡皮刮刀大略拌均一下,然后用搅拌机拌至幼滑状态。
4。把面糊倒入蛋糕模,用橡皮刮刀抹平表面,可依个人喜好,铺上奇异果片,杏桃片,草莓块和蓝莓(勿将水果按压到面糊层底)。
5。放入预热摄氏180度的 烤箱,烘烤60-70分钟。在烘烤的最后15分钟,表面覆盖上一层锡纸以防颜色太深。
6。让模内的蛋糕放凉越5-10分钟,脱模后放在铁丝架上待凉,表面撒上糖霜。


Fruit Pastry Cake
Recipe adapted from :  Anncoo Journal

Ingredients:
100g Butter, soften at room temperature
150g Caster sugar
2 tbsp Sour cream/natural yoghurt
3 Eggs, lightly beaten
1 tsp Vanilla extract
1 tbsp Lemon juice & zest from one lemon
210g Plain flour - sifted
1 tsp Baking powder 

Some canned Halve peaches,strawberries,blueberries and kiwi fruit ,sliced.

Method:

1.  Grease a 9 inch round cake pan with butter and flour or non-stick spray and line the base with parchment paper.
2.  Cream butter, sugar and sour cream till light and fluffy.
3.  Dribble in the eggs gradually and beat till incorporated in the batter, (The mixture appear slightly curdled)
4.  Add vanilla extract, lemon juice and zest.
5.  Dump in the flour and baking powder and use a rubber spatula to stir roughly and continue to cream the batter with mixer until smooth. Pour batter into prepared pan and smooth out the top with a spatula.
6.  Arrange fruits on top, don't press the fruits down into batter. Decorate the fruits as desired.


@@@@@ Enjoy ! @@@@@


2015年11月25日星期三

韩式帕玛森乳酪麻磁面包( Korean Parmesan Cheese Mochi Bread)


这是继那天做了Q Q韩式嘛糍面包
受到两父女的青睐后,再次开炉的成品。
不同的是,这次以帕玛森乳酪粉取代了一些预拌粉的量。
面包还在烤炉时,就乳酪香气弥漫整个厨房,
让人迫不及待,想大快朵颐呢!


这回刻意的烤焦黄一些,以图面包皮香脆有加,
面包体还是保有一贯的QQ软软。
帕玛森乳酪的加入,让这面包的美味更加提升!
那两父女可是进咬一个,出咬一个,
没两下子又见篮底了!
而且还一直喊:ho chiak!


韩式帕玛森乳酪麻磁面包
(可做12粒)

 材料:
市售韩国面包預拌粉270g,

高筋粉40g,
帕玛森乳酪粉27g,
糖粉13g
烤香黑芝麻27g,
奶油60g,

鸡蛋1颗(约50g),
醬油3g,
牛奶135g,


做法 :
1。   将所有材料倒入搅拌缸中,一开始先用慢速2分钟将所有材料搅拌成无粉粒团状。  
2。   再使用中速搅打4-5分钟成为一个均勻的面团。
3。   缸盆表面覆盖一块湿布,休面10分钟。

4。   工作抬上稍微塗抹一些油避免沾粘,將休好的面团倒出,平均分成10等份(每份约50g).
5。    手上沾些油, 将分好的小面团滚圆,间隔排放烤盘中,然后整盘放入烤箱中,关上烤箱门休面10分钟。
6。    将烤盘从烤箱中取出,烤箱打开預热至170度c。
7。    将面包放入已預熱烤箱,烘烤5分钟后,打开烤箱,在面包表层噴水,然后再次关上烤箱门,再烘烤5分钟,再打开烤箱,噴水。  最后将温度調整 为160度c,再烘烤25 -30分钟即可。


韩国面包預拌粉Korean Mochi bread premix)


Korean Parmesan Cheese Mochi Bread

(Yield 12 pieces)

 Ingredients :
270g Korean Mochi bread premix
40g bread/high protein flour
27g Parmesan cheese powder
13g icing sugar
50g whole egg 
135g milk
60g butter
3g light soy sauce
27g  toasted black sesame seeds

Method :
1.  Add all the above ingredients into the mixing bowl. Use low speed(2 minutes) to mix it into a dough. 

2.  Increase the speed to medium, continue for about 4 - 5minutes until to form an even dough.
3.  Cover the mixing bowl with a wet cloth , let the dough rest for 10 minutes.
4.  Greased your hand and divide the dough into 10 small round balls about 50g per portion. 

5.  Place the small buns in a greased baking tray and let it rest for another 10 minutes.
6.  Bake in a preheated oven at 170'C for 5 minutes. Then take out the baking tray from the oven, lightly spray some water onto the bread. Bake for another 5 minutes. Again take out the baking tray, lightly spray with water the bread again.
7.  Finally, reduce the temperature to 160'C and bake again for another 25-30 minutes then it is done .


@@@@@ Enjoy !@@@@@


2015年11月22日星期日

芒果斯里木卡糕(Mango Seri Muka)


吃过泰国一道出名甜品,蒸芒果糯米饭,有点怀念!
突然心血来潮,想把它换个方式呈现,
同样是糯米,同样是芒果,
同样是水蒸方式,
不同的是“泰式”被“娘惹风味”取代,
所以就尝试做了这个芒果斯里木卡糕。


 出来的成品,有惊喜!
糯米层保留一贯的椰奶香气,
上层的芒果层,或许我的芒果汁带酸,所以它是酸多于甜。
两者相配,与其说是糕,不如说是甜品较为贴切。

有人觉得,过酸很难和甜甜的“Kuih”相提并论,
有人觉得,酸甜适中,香糯不腻,
就是有人喜欢有人不接受,
问我?我倒觉得如果芒果汁的酸度稍微减一些,
倒是不错的甜品。


芒果斯里木卡糕 :
6寸方形模
食谱参考 : 这里

下层材料:

糯米 ~ 150g (浸4小时)
椰浆 ~ 80ml
水~ 25ml
盐 ~ 1/8 茶匙
班兰叶 ~ 2片(切成8小片)

上层材料:
鸡蛋 ~1粒
幼糖 ~ 60g
普通面粉 ~ 20g
玉粟粉 ~ 5g
盐 ~ 1/8茶匙
芒果汁 ~ 60ml
椰浆 ~ 100ml

下层做法:
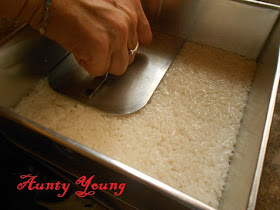
1。将全部材料倒入6寸方型烤盘内,稍微搅拌均匀,排班兰叶在上面,蒸15分钟。
2。取出班兰叶,再度轻轻搅匀,继续蒸5分钟。
3。将烤盘取出来,并将饭压紧,备用。


上层做法:
1。先将鸡蛋和幼糖用糖匙搅拌约2分钟,备用。
2。另外一个大碗里放入其它材料混匀拌匀。加入(1)再拌匀,过滤。
3。然后放入蒸锅里边煮边搅拌至热或比较浓即可(大约只蒸5分钟)。将浓稠的面糊倒入糯米饭上。
4。用中火蒸15分钟或凝结,取出待冷后,切块即可。 


Mango Seri Muka
6" square tray

Bottom layer ingredients

Glutenous rice ~ 150g (soak 4hours)
Coconut milk ~ 80ml
Water~ 25ml
Salt ~ 1/8 tsp
pandan leaves ~ 2(cut into 8 small pcs)

Top layer ingredients:
Egg ~1
Sugar  ~ 60g
Flour ~ 20g
Corn flour ~ 5g
Salt ~ 1/8tsp
mango juice ~ 60ml
Coconut milk ~ 100ml

Method of bottom layer:
1. Pour all the bottom layer's ingredients into a 6 inches square tray. Mix well, arrange the pandan leaves on the top, steam for 15 minutes.
2. Remove the pandan leaves, stir and mix well, continuous steam for another 5 minutes.
3. Remove the tray from the steamer, press the rice firmly,set aside.


Method of top layer :
1.  Use a hand mixer beat the egg and sugar for about 2 minutes.
2.  In a mixing bowl, pour in all ingredients, mix well. Add in the egg mixture from (1), stir well.  Sift the mixture.
3.  Cook the sifted mixture in a double boiling pot, until become thicken(about 5 minutes), pour the thicken mixture on the glutenous rice.
4.   Steam the kuih with medium flame for 15 minutes, remove from the steamer, cut into pieces when it is cooled and serve.


2015年11月17日星期二

香芒开心果隔夜燕麦(No- Cook Overnight Oats with Pistachio Mango)


 我知道,你们一定在想,
安迪一定是吃隔夜燕麦上瘾了,
哈。。。。哈。。。。。。


不好意思,今天本来要上面包的,
可是早上看到美女Grace Shing也上了这道芒果隔夜燕麦,
我不甘寂寞,嚷着一起玩,
可是。。偏偏被安哥拉了出去办事,
所以迟到了。
对不去啊,美女,让你久等了!


怀念那天的香芒费南雪美味,
所以这次的隔夜燕麦,
就以香芒开心果为主要佐料了。


香芒开心果隔夜燕麦
材料:
6汤匙 有机燕麦
1/2杯 牛奶
1/2杯 优格/酸奶
1汤匙 亚麻籽

芒果,葡萄干和蜜瓜干适量,切丁
2汤匙  烤香开心果

1/2茶匙 香草香精
蜜糖,适量


做法:

1。用一个干净的玻璃碗,放入燕麦片,亚麻籽和优格。


2。之后慢慢加入牛奶值到近3/4满,倒入1/2茶匙的香草香精然后用干净的勺子轻轻搅拌把瓶底下的燕麦和牛奶拌匀


3。最后加入准备好的水果,再搅两三次,盖上保鲜膜后放进冰箱冷藏隔夜。


4。隔天当你要享用时就以随意添加一些蜂蜜,搅拌后就能享用一份健康又营养的早餐了。


No- Cook Overnight Oats with Pistachio Mango

Ingredients: 
6 tbsp Organic Rolled Oats
1/2 cup Fresh Milk
1/2 cup Plain or Greek Yoghurt
1 tbsp Flax seeds
Some mango, raisin and dried honeydew (diced)
2 tbsp toasted pistachio
1/2 tsp Vanilla extract
some honey


Method:
1.  Using a clean sterilized glass bowl, add rolled oats, flax seeds and yoghurt.


2.  Pour in milk, drop in 1/2 teaspoon of vanilla extract and gently stir the mixture with a clean spoon to loosen the oats at the bottom of the jar. Add a little more milk if the mixture is too thick.


3.  Lastly add in the fruits and pistachio, give a few stirs. Cover the bowl with cling wrap and leave the mixture overnight in the fridge.


4.  In the morning, before having your oats, drizzle some honey to sweeten the taste.


我喜欢干果嚼劲的口感,
所以只浸泡燕麦,亚麻籽,牛奶和优格,
水果和坚果都保留在隔天早上欲享用时,再参进去。


2015年11月15日星期日

胡桃哈密瓜隔夜燕麦 ( No- Cook Overnight Oats with Pecan Honeydew)


 发觉。。。。
原来,我喜欢吃这类隔夜燕麦,
所以它们已经悄悄成了我的新宠。


 那天第一次,应了靓二的邀请,
竟然一试倾心,深深爱上这口感丰富的隔夜燕麦。

原来只是本着,配合靓二的善意邀请,
同时又可以乘机清仓,解决那堆剩余的零散干果。
没想到,意外收获,
隔夜燕麦已成我一周数餐的午餐了。


核桃奇异果 隔夜燕麦

材料:
6汤匙 有机燕麦
1/2杯 牛奶
1/2杯 优格/酸奶
1汤匙 亚麻籽

哈密瓜,樱桃番茄适量(切丁),橄榄圈
2汤匙  烤香胡桃

1/2茶匙 香草香精
蜜糖,适量


做法:

1。用一个干净的玻璃碗,放入燕麦片,亚麻籽和优格。


2。之后慢慢加入牛奶值到近3/4满,倒入1/2茶匙的香草香精然后用干净的勺子轻轻搅拌把瓶底下的燕麦和牛奶拌匀


3。最后加入准备好的水果和胡桃,再搅两三次,盖上保鲜膜后放进冰箱冷藏隔夜。


4。隔天当你要享用时就以随意添加一些蜂蜜,搅拌后就能享用一份健康又营养的早餐了。


换汤不换药,
这一碗的佐料是,
烤香胡桃,哈密瓜,橄榄圈和我超爱的樱桃番茄。


No- Cook Overnight Oats with Pecan Honeydew

Ingredients: 
6 tbsp Organic Rolled Oats
1/2 cup Fresh Milk
1/2 cup Plain or Greek Yoghurt
1 tbsp Flax seeds
some Honeydew,olive ring and cherry tomato
2 tbsp toasted pecan
1/2 tsp Vanilla extract
some honey


Method:
1.  Using a clean sterilized glass bowl, add rolled oats, flax seeds and yoghurt.


2.  Pour in milk, drop in 1/2 teaspoon of vanilla extract and gently stir the mixture with a clean spoon to loosen the oats at the bottom of the jar. Add a little more milk if the mixture is too thick.


3.  Lastly add in the fruits and pecan, give a few stirs. Cover the bowl with cling wrap and leave the mixture overnight in the fridge.


4.  In the morning, before having your oats, drizzle some honey to sweeten the taste.


我喜欢干果嚼劲的口感,
所以只浸泡燕麦,亚麻籽,牛奶和优格,
水果和坚果都保留在隔天早上欲享用时,再参进去。


@@@@@@ Enjoy !@@@@@